
LIGHTROOM EXAMPLE
Adobe LIGHTROOM gives the most control over downsizing.
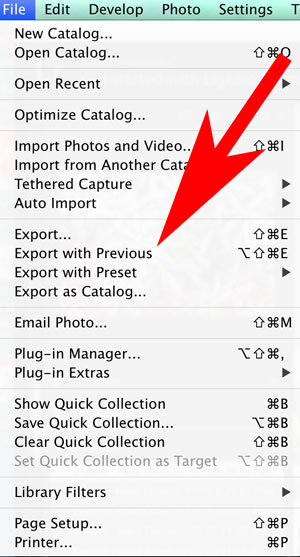
Use File/Export
Use File/Export
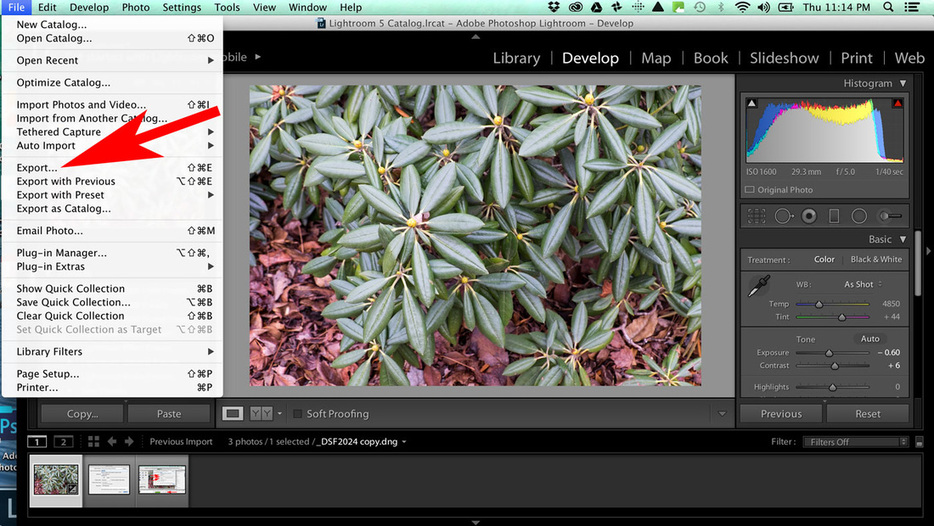
The starting file is .dng from import of a raw file from the camera into Lightroom (import as .dng). Developing adjustments to the .dng file have been made in Lightroom, resulting in a file 4896x3264 pixels and 25.8 MB.
In the Export dialogue, select Image format = JPEG, Color Space= sRGB, Resize to fit Width 1400 & Height, Output sharpening for screen, standard. Resolution in pixels per inch was left on the default value (240 pixels/inch) , although the web "standard" is often stated to be 72 pixels/inch; pixels per inch can be any value without affecting the appearance on the web.
Click blue Export button on lower right.
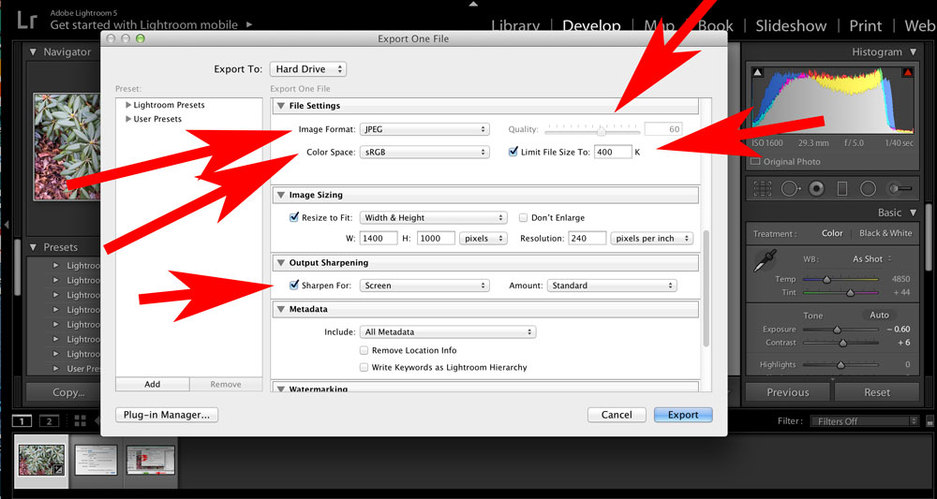
Final downsized image is 1400 x 933 pixels, 380k.
If you are downsizing multiple images, you can use the "Export with Previous" on subsequent images, to instantly repeat using the same settings. Even more automation can be achieved by developing a user export preset (but this is much more difficult to set up for Export than for Develop presets in Lightroom).
|
Copyright © 2014-2024.
Southeastern Chapter of the American Rhododendron Society. All rights reserved. Unless otherwise noted, original content on the SE-ARS website is released under a Creative Commons Attribution 3.0 License. |
|

Our website is under continuous development and is updated at least weekly. Please email us by clicking on the above icon if you see a possible error, or have a comment or message for SE-ARS. [email protected]
|
|